If you’re like most businesses, you’ve found that utilizing Facebook as a way to reach your targeted audience can be a great form of communication. But how do you reach the people who aren’t following you? Facebook Ads can be an answer. This may seem daunting at first, but we’ll go step-by-step on how to place an ad on Facebook and you’ll be a pro in no time.
Costs of advertising on Facebook can be low, but it is still money you are putting into your business. Make the investment worth it by setting up your ads correctly, and watching the impact they are making. Check out this guide from Jen – our social media manager at Evergreen Media – to help you walk through the process.
First things first, you need to have your Business Manager Account set up in order to create Facebook ads. If you don’t have one, here is a great resource to help you out. It can be a bit tricky sometimes, so if you run into any issues, please feel free to contact us, and we can troubleshoot with you. (It’s free for the first hour!)
How to Place an Ad on Facebook: A Guide
Now that your account is all set up, it’s time to create your first ad! Know that Facebook updates its user interface regularly, so your screen might not look exactly like ours. The basic functionality should be the same though. If you have troubles finding something, we’re a short phone call away and we’re happy to help!
Step 1
We have an ad to create for our Black Hills Coupon Book, so I’ll go through the steps with you. From your Business Page, you will click on “Ad Center” which is located on your top navigation bar, commonly the second option from the left. When you get to the overview of the Ad Center, click “All Ads” on the left hand column, then “Show more details in Ads Manager”. (TIP: Want a faster way of getting to your Business Manager account? Use business.facebook.com! You’ll want to log into your Facebook account first.)
Once you’re in, this is what it will look like. (below) This is your dashboard where you create new ads and review past ad campaigns. If you’ve had any previous ads for your page, they will be listed out here for you to view and track how your they performed. Cool, right? We love data!

Step 2
To start a new campaign, click “Create” in the left corner. (circle below) You’re going to see “campaigns”, “ad sets” and “ads” across the top as tabs. Don’t be overwhelmed by the word campaign! Your campaign is your broad objective – we will go into each section more below. Keep reading; you’ve got this!

Before diving into images/video and messaging, you need to ask yourself: “What is my objective for this campaign?”
What do you want people to do when they see it? What is your end goal?
We will be creating an ad for our Spring Savings sale for Black Hills Coupon Book. In this campaign we want people to go to our website and purchase a book using the promo code, so we will choose ‘Traffic’ as our objective for this campaign. Once you have determined your objective, name your campaign and set your budget. You can set a daily budget (this ad will be $5/day for 4 days). A daily budget is great when you want to make sure your dollars are distributed evenly each day. You can also do a budget for the lifetime of your campaign.
CAUTION: Be sure to set your budget. Out of sight, out of mind is a real thing when it comes to social ads. You don’t want to remember your campaign a month from now and realize your charges have been building up because you forgot this step. A good base is to budget $50-100 per month. We split this up through multiple campaigns, or you can use it one; it’s completely up to you on how much and how often your dollars get used!

Step 3
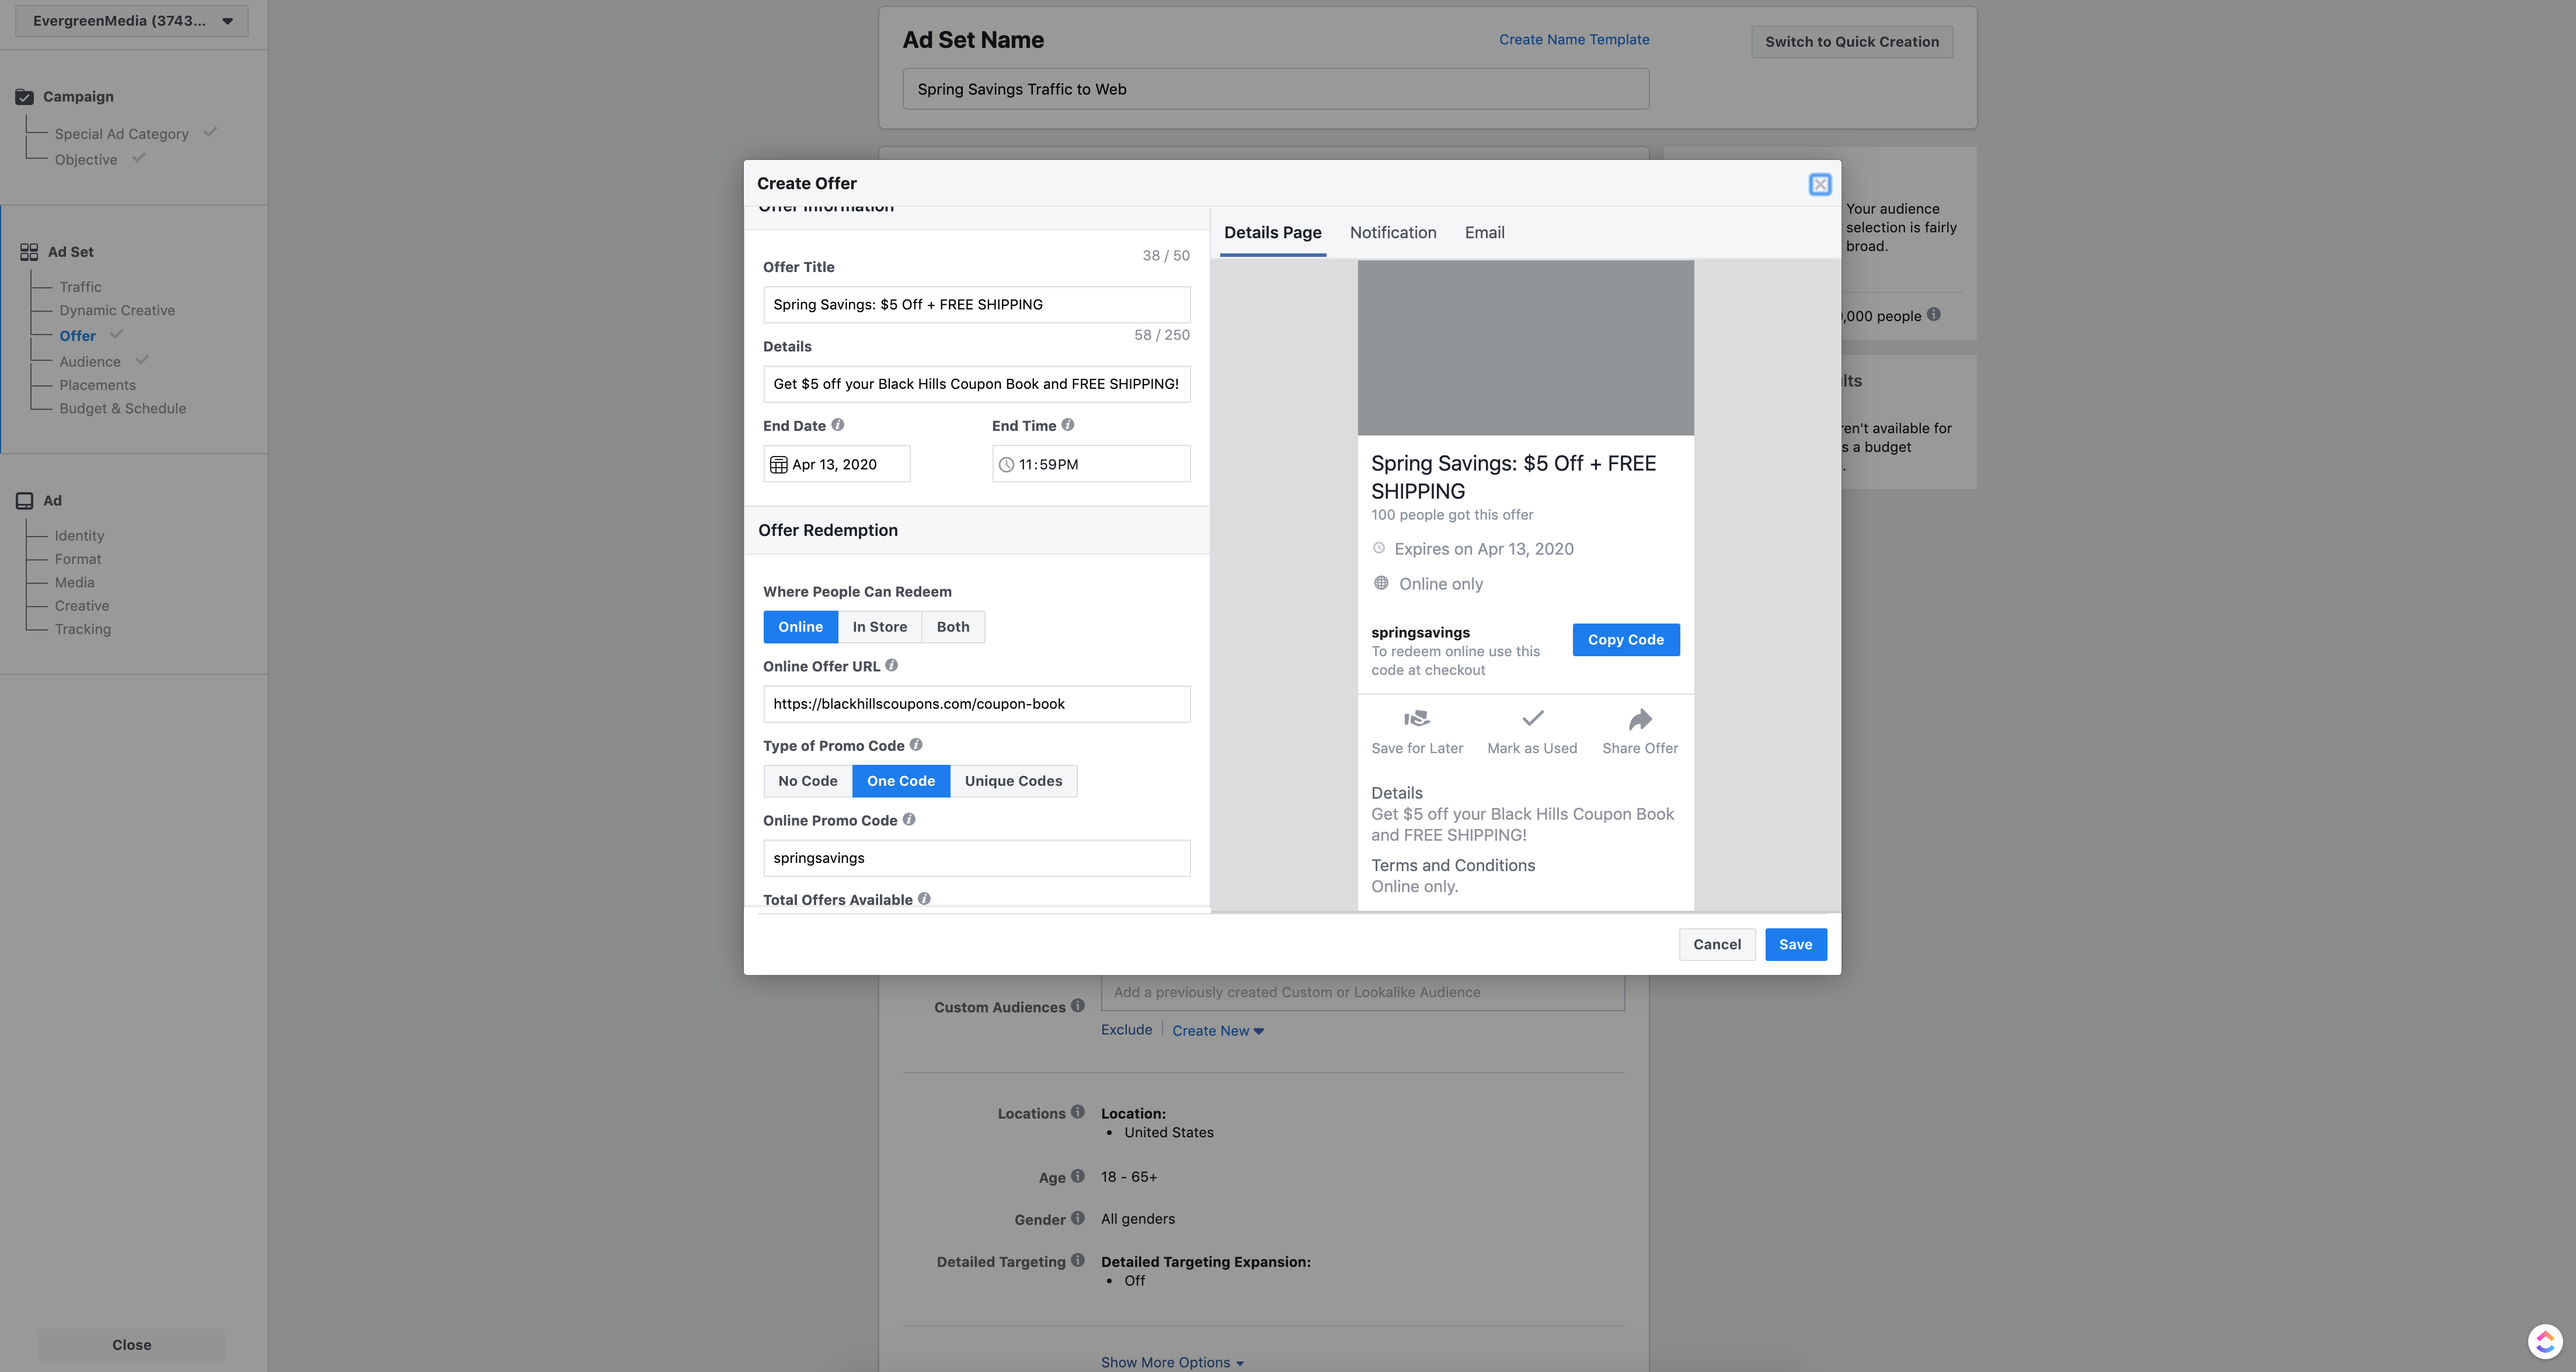
Once you have your campaign parameters set, you can move on to the Ad Set. You’ll name your Ad Set (if you are running more than one, it’s best to label them by audience or offer). Then, choose where you want to drive your traffic (if that’s your objective). Since our ad includes a promotion with a special offer for people, we will create an offer on Facebook to go along with our ad. This allows people to see all the offer details and save the coupon code directly from Facebook.

Creating an offer is pretty straight forward. Here’s what it looks like:
Step 4
The next step is setting your audience. Part of knowing how to place an ad on Facebook is understanding who your audience is. Facebook allows you to save audiences from previous ads or upload your own contact list to create a lookalike audience with. This is such a great tool that allows you to get very specific with your audience (if that’s what is best for your ad). For our ad example, we will create our own, new target audience.
Rewind back to step 2 and think about the objective you set for your campaign, then relate that to your audience.
What kind of people do you want to see your ad? Whose eyeballs are you trying to get in front of?
Think of the demographics your target audience includes. This includes location, gender, age ranges, interests, behaviors, etc.
For this Black Hills Coupon Book promotion, we want people in the Black Hills to see our ad. We set our location to Rapid City, and then added a 50-mile radius to catch the Black Hills region parameters. Next, you can choose your age range and gender preferences. Then, you’re ready for detailed targeting. This gets more specific into people’s interests, behaviors, and important life events. What kinds of things are the people in your audience doing? How will your ad relate to these other things they are interested in?
We chose people that express interest in nature, travel, coffeehouses, and restaurants. This audiences works for us because our coupons are made with those categories in mind. We also added people who have expressed an interest in savings like coupons (for obvious reasons).
TIP: If you are selling something in your ad, the ‘Engaged Shopper’ selection is always great because Facebook will put your ad in front of people that have recently clicked on the “Shop Now” button on other ads that they have seen.
Your audience summary is on the right side with Facebook’s prediction of the number of people you could potentially reach with your targeted audience. Make sure you’re in the green. You don’t want your audience too broad where your ad is being wasted in front of people who don’t care about it and you don’t want it too small to the point that not enough people are seeing it. Take your time on your audience selections and put some thought into it! (Note: This is not always the case, but a general rule of thumb. As you begin placing more ads and gathering data, you will be able to make more strategic placements.)

Step 5
Let’s move on to what your ad is going to look like! Name your ad and make sure the correct Facebook account is selected if you have more than one page. Then, you’ll choose what format you want your ad to be in.
We are using a single picture with a caption and a “Shop Now” button that will take people to our website to purchase. For single images, we have found that a good size is 1080×1080 pixels. This way nothing gets cut off!

TIP: Try to use pictures with little words on them. Facebook doesn’t allow word-heavy pictures and will show your ad to fewer people if it doesn’t meet their requirements if it isn’t rejected altogether. Try putting the words you want to send across to users in your caption instead.

Review and Confirm
Once you are happy with your ad, click “Review” to go over everything you selected while creating this ad.
Double-check everything.
Does it look good? Hit confirm and Facebook will review it to make sure it meets their guidelines.
Congrats! You did it!
It may seem like a lot at first, but each time you go to create another ad, you will get better and better.
Even if you don’t have an ad to create right now, I would encourage you to just go in and explore it! Check out the different objectives and formats to get familiar with them.
Facebook ads can be a relatively easy way to get in front of users who you classify as your target audience. Now that you know how to place an ad on facebook, try it out, and let us know how it goes!
If you need any help at all, we are only a call or click away.